Body

Off With The Paint

My cousins and uncle were able to take the doors off today. They started to find ways to get the paint off. Apparently there were several colors and layers of paint on this car. 

They tried sanding and chemical stripping. The process was long. We'll need to talk about the best way to move forward with this process. 

There was some door rot on the bottom of both doors. One much worse than the other. The good news it can be patched pretty easily, and did not go beyond the very bottom outer edge of door. Counting my blessings that this car is in pretty good shape body wise, and (knock on wood) will only require some smaller patch work.

Removal Day One

Had another ambitious day in mind today. It took a bit of analyzing from my cousin and I to determine how to remove the bumper and grille housing. 

We were able to successfully remove the headlights, front bumper, and front valance. Also removed the parking lights in the front. I thought they were the fog lights, but apparently they didn't make fog lights in 1967. Removal takes hours. It really takes a lot of muscle to remove they old bolts. And some are just so hard to get to, you have take off other things you weren't planning to first. I can took care of bagging and labeling every screw, nut, and bolt. I'm trying to take exhaustive pictures, so I can remember how to put everything back together. I am very nervous though. It may be harder to put everything back on.

Also, started removing some of the trim from the front of the car. The piece on the driver fender extension and 'Mercury' emblem would have to wait another day. The Grille, which includes the hideaway headlights, was a puzzle. Each bolt taken out seemed to not loosen the housing at all. 

My cousin took a walk around the car with a screw driver to find the body rot. Only need a few patch panels for small parts of the quarter panels and fenders. 

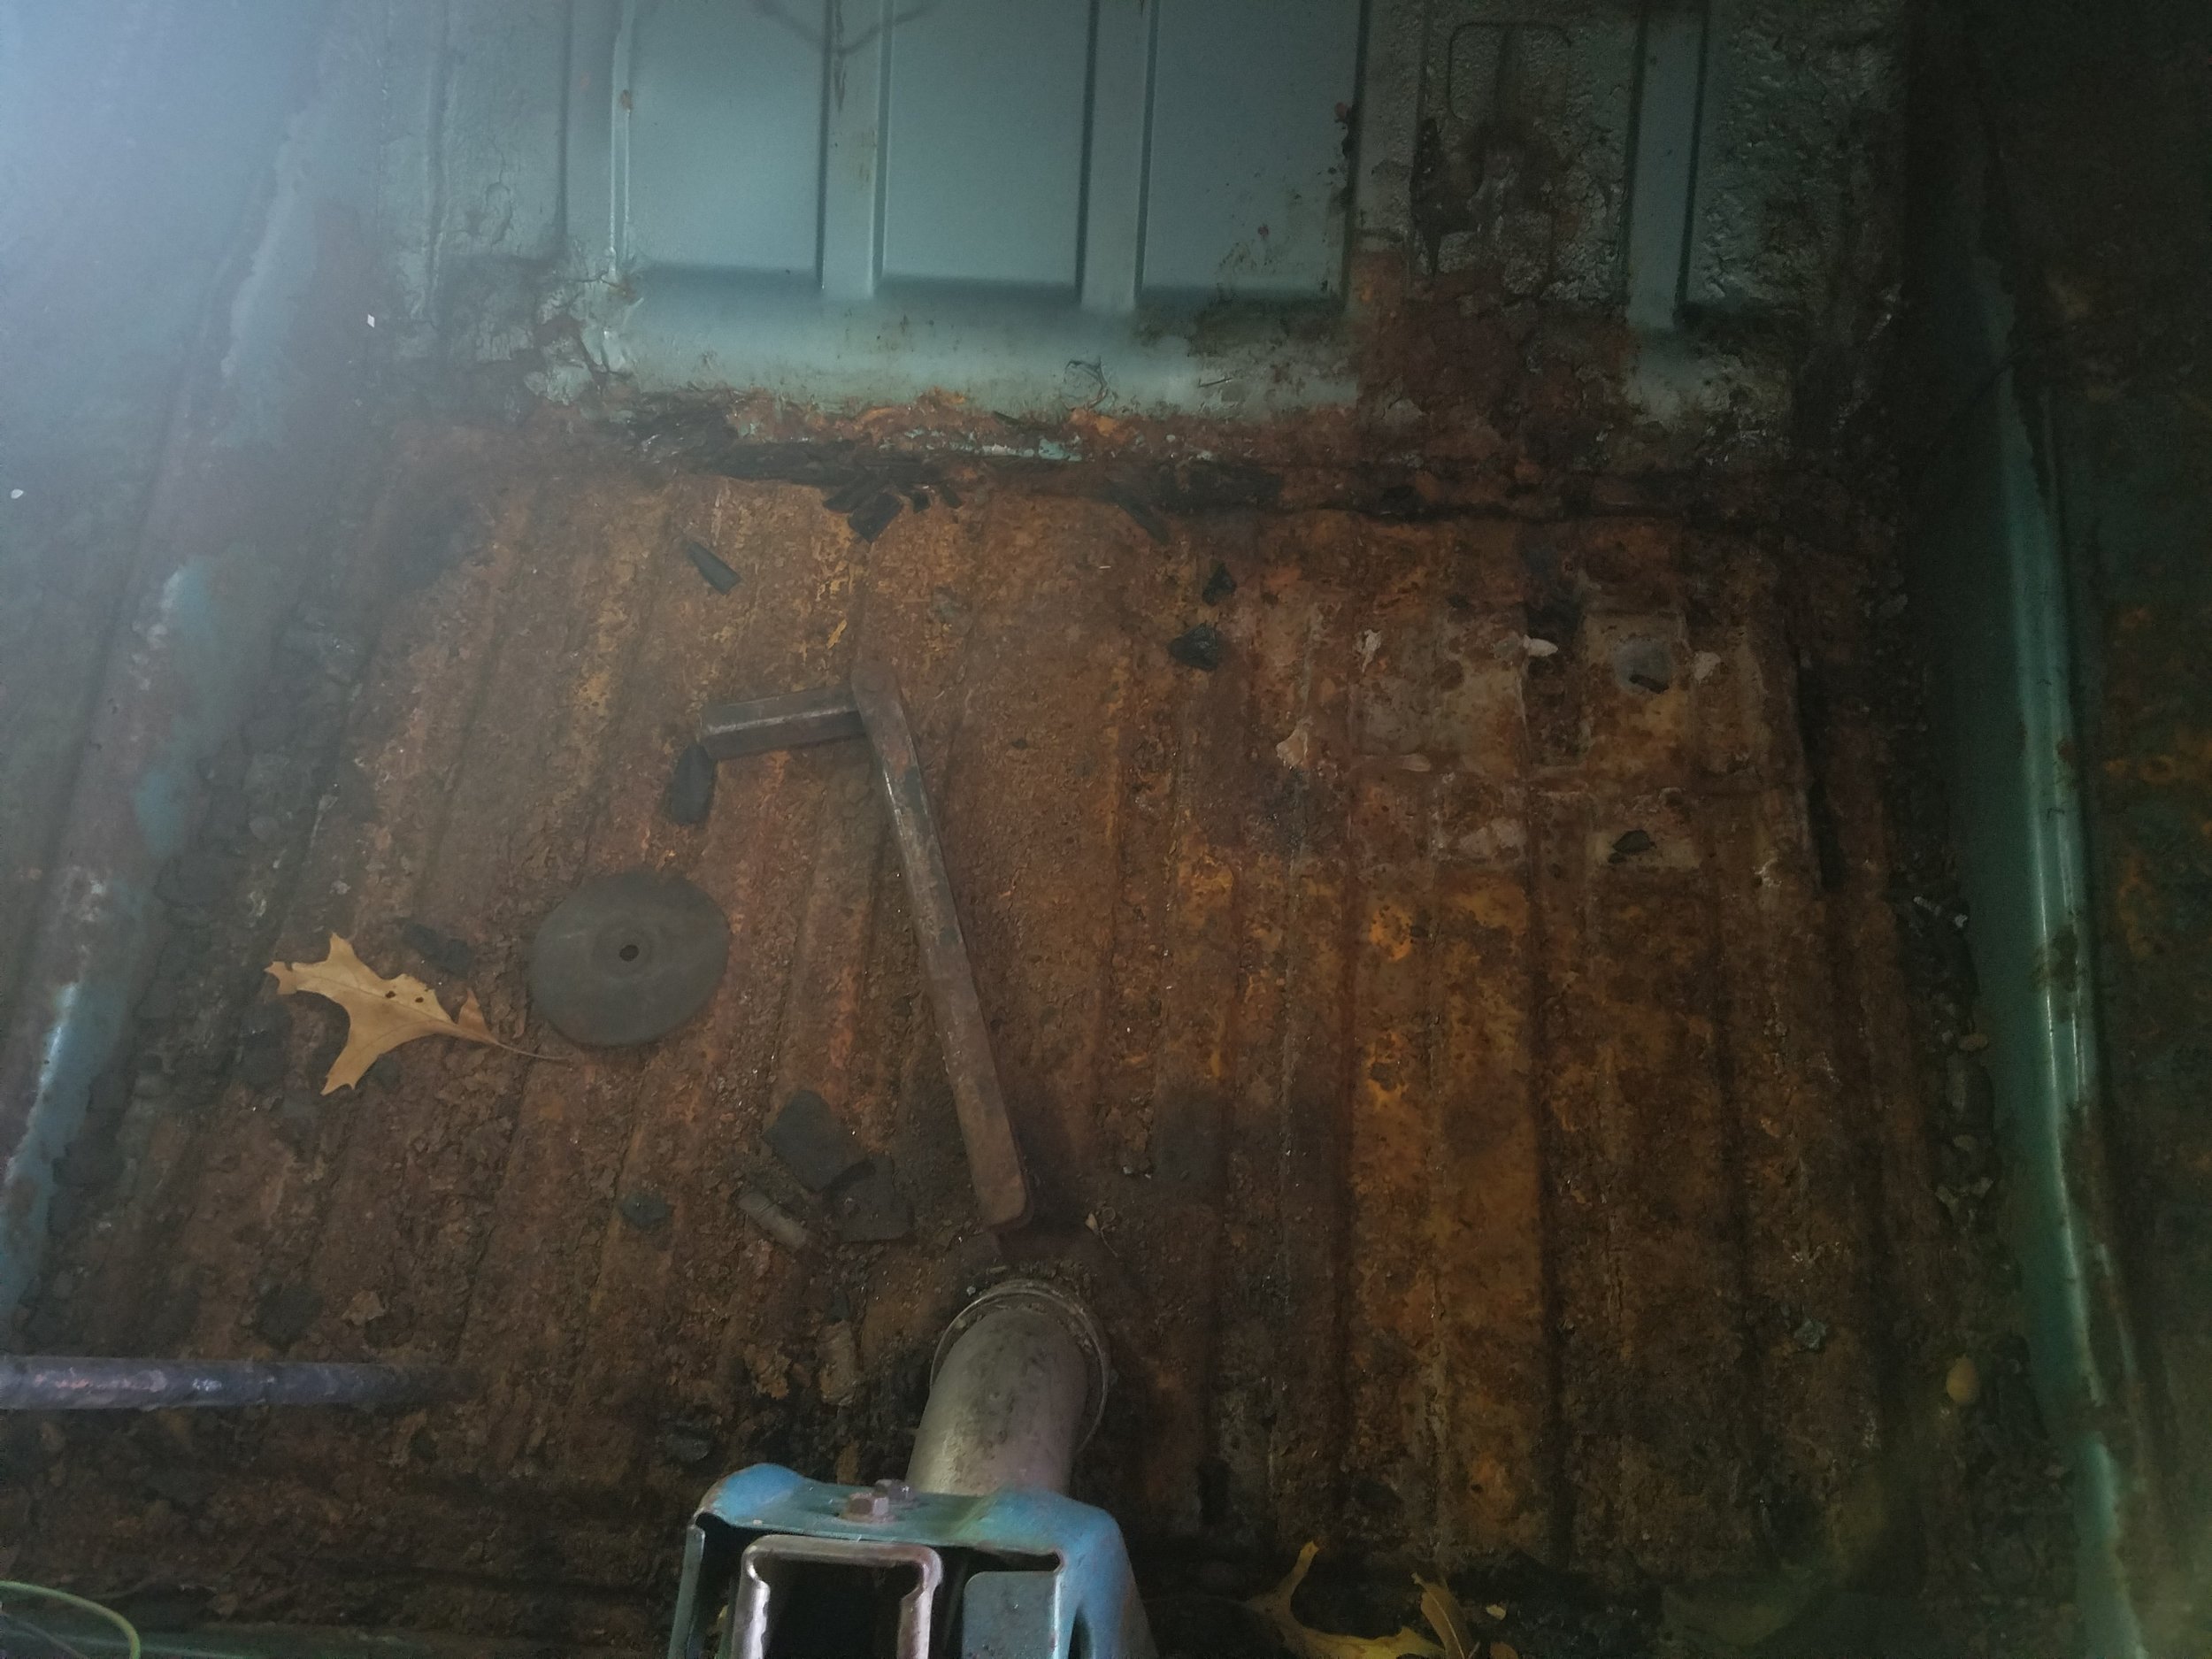
Then I opened the trunk to clean it out. I labeled and organized all the parts with the ones we removed. Then, I removed the plaid patterned original trunk liner. It was old and musty, and ripped in some areas. Underneath, I noticed that the middle of the trunk was very rusty, but all around seemed in great shape and still painted the body color.  My cousin came around and said it was the gas tank. It was rotted through, but with all the rust on the top, I'll be adding a new gas tank to the list. 

Positive Body Image

With the Christmas season now over, it's time to pick up the ratchets again. Today, I enjoyed strolling through the Car Expo with my cousin and his family. While popping in and out of new cars with my godson, and pretending to drive, I was scoping out car colors along the way to see which to go with for the Cougar. The expo had an abysmal showing in the classic car exhibit, so no luck there. With the interior of my car being shades of aqua, I was focusing on cars with white or blue paint jobs. Right now I'm liking a shiny pearl white paint job. 

I'm pretty sure I will not be putting a vinyl top back on the car, and would like to paint it. My cousin showed me some sketches he had colored in with markers to show me some striping options. I hadn't really thought about stripes too much, so now I've hit the internet for other inspiration. I'm liking a stripe on the hood, and along the bottom body line. But I can't quite picture it with the colors I'm looking at. This is going to be hard decision, especially since I can be very fickle with these sorts of things. It's a good thing I don't need to decide right now. Let me know what you think of the options I've found out there. 

So what's next? 

  1. My car has been moved to my cousins house. He has a large barn/garage and all the tools, I can possible need. This is really a big help! I don't have a garage, and tools are really expensive. I'm lucky that he's allowing me to use them. 
  2. Assess the body rot and any damage
    1. My cousin is going to help me identify any repair or patch panels I will need. He's let me know all of the material I will need to buy to strip the paint, patch, and prime. He will be performing a lot of the body work. Hopefully, I can help with some of the welding, but I really don't know what I'm doing there, and the flame scares me.
  3. Remove all necessary parts and trim to prep for body work
  4. Fixing and preparing the body will happen alongside mechanical work that is required.