I think today I finally learned my lesson. I need to take my to-do list for the day and cut it in HALF. This work is a lot harder and a lot more time consuming than I ever seem to think it is. I have a lot of half finished to-dos. Either because some bolts are too hard to get off and take a lot of elbow grease, (I need to get back to the gym) or we need to research how to take things apart first. Today was supposed to be a remove and replace day, but we got to some of the removal only.
My brother helped out again today. First, we each took a door, and removed the handles and lock cylinders. We had to take the panels off to reach inside the door to get at some of the bolts and nuts. Then we moved on to tackle the gas tank.
My brother had to drill out some of the bolts on the on the tank that wouldn't budge. My cousin removed the drain plug, and we started to drain the gas out, while tackling some more trim removal and the removal of the tie rods. I was only able to get 1 outer tie rod removed today.
Once the gas seemed drained, we needed to remove the fill pip that attaches to the tank and leads behind the license plate between the the taillights. Removing the bolts were straight forward, but the fill pipe was still sealed to the tank pretty well. My brother was able to remove it, but not without it swiftly coming through the back and knocking him where the sun don't shine. OUCH!
I was safe under the car, tipping the remaining of the gas out, and removing the fuel lines connecting to the tank. Removed the float from inside the tank that indicates when you are low on gas. I'm hoping it works and can be reused in the new tank.
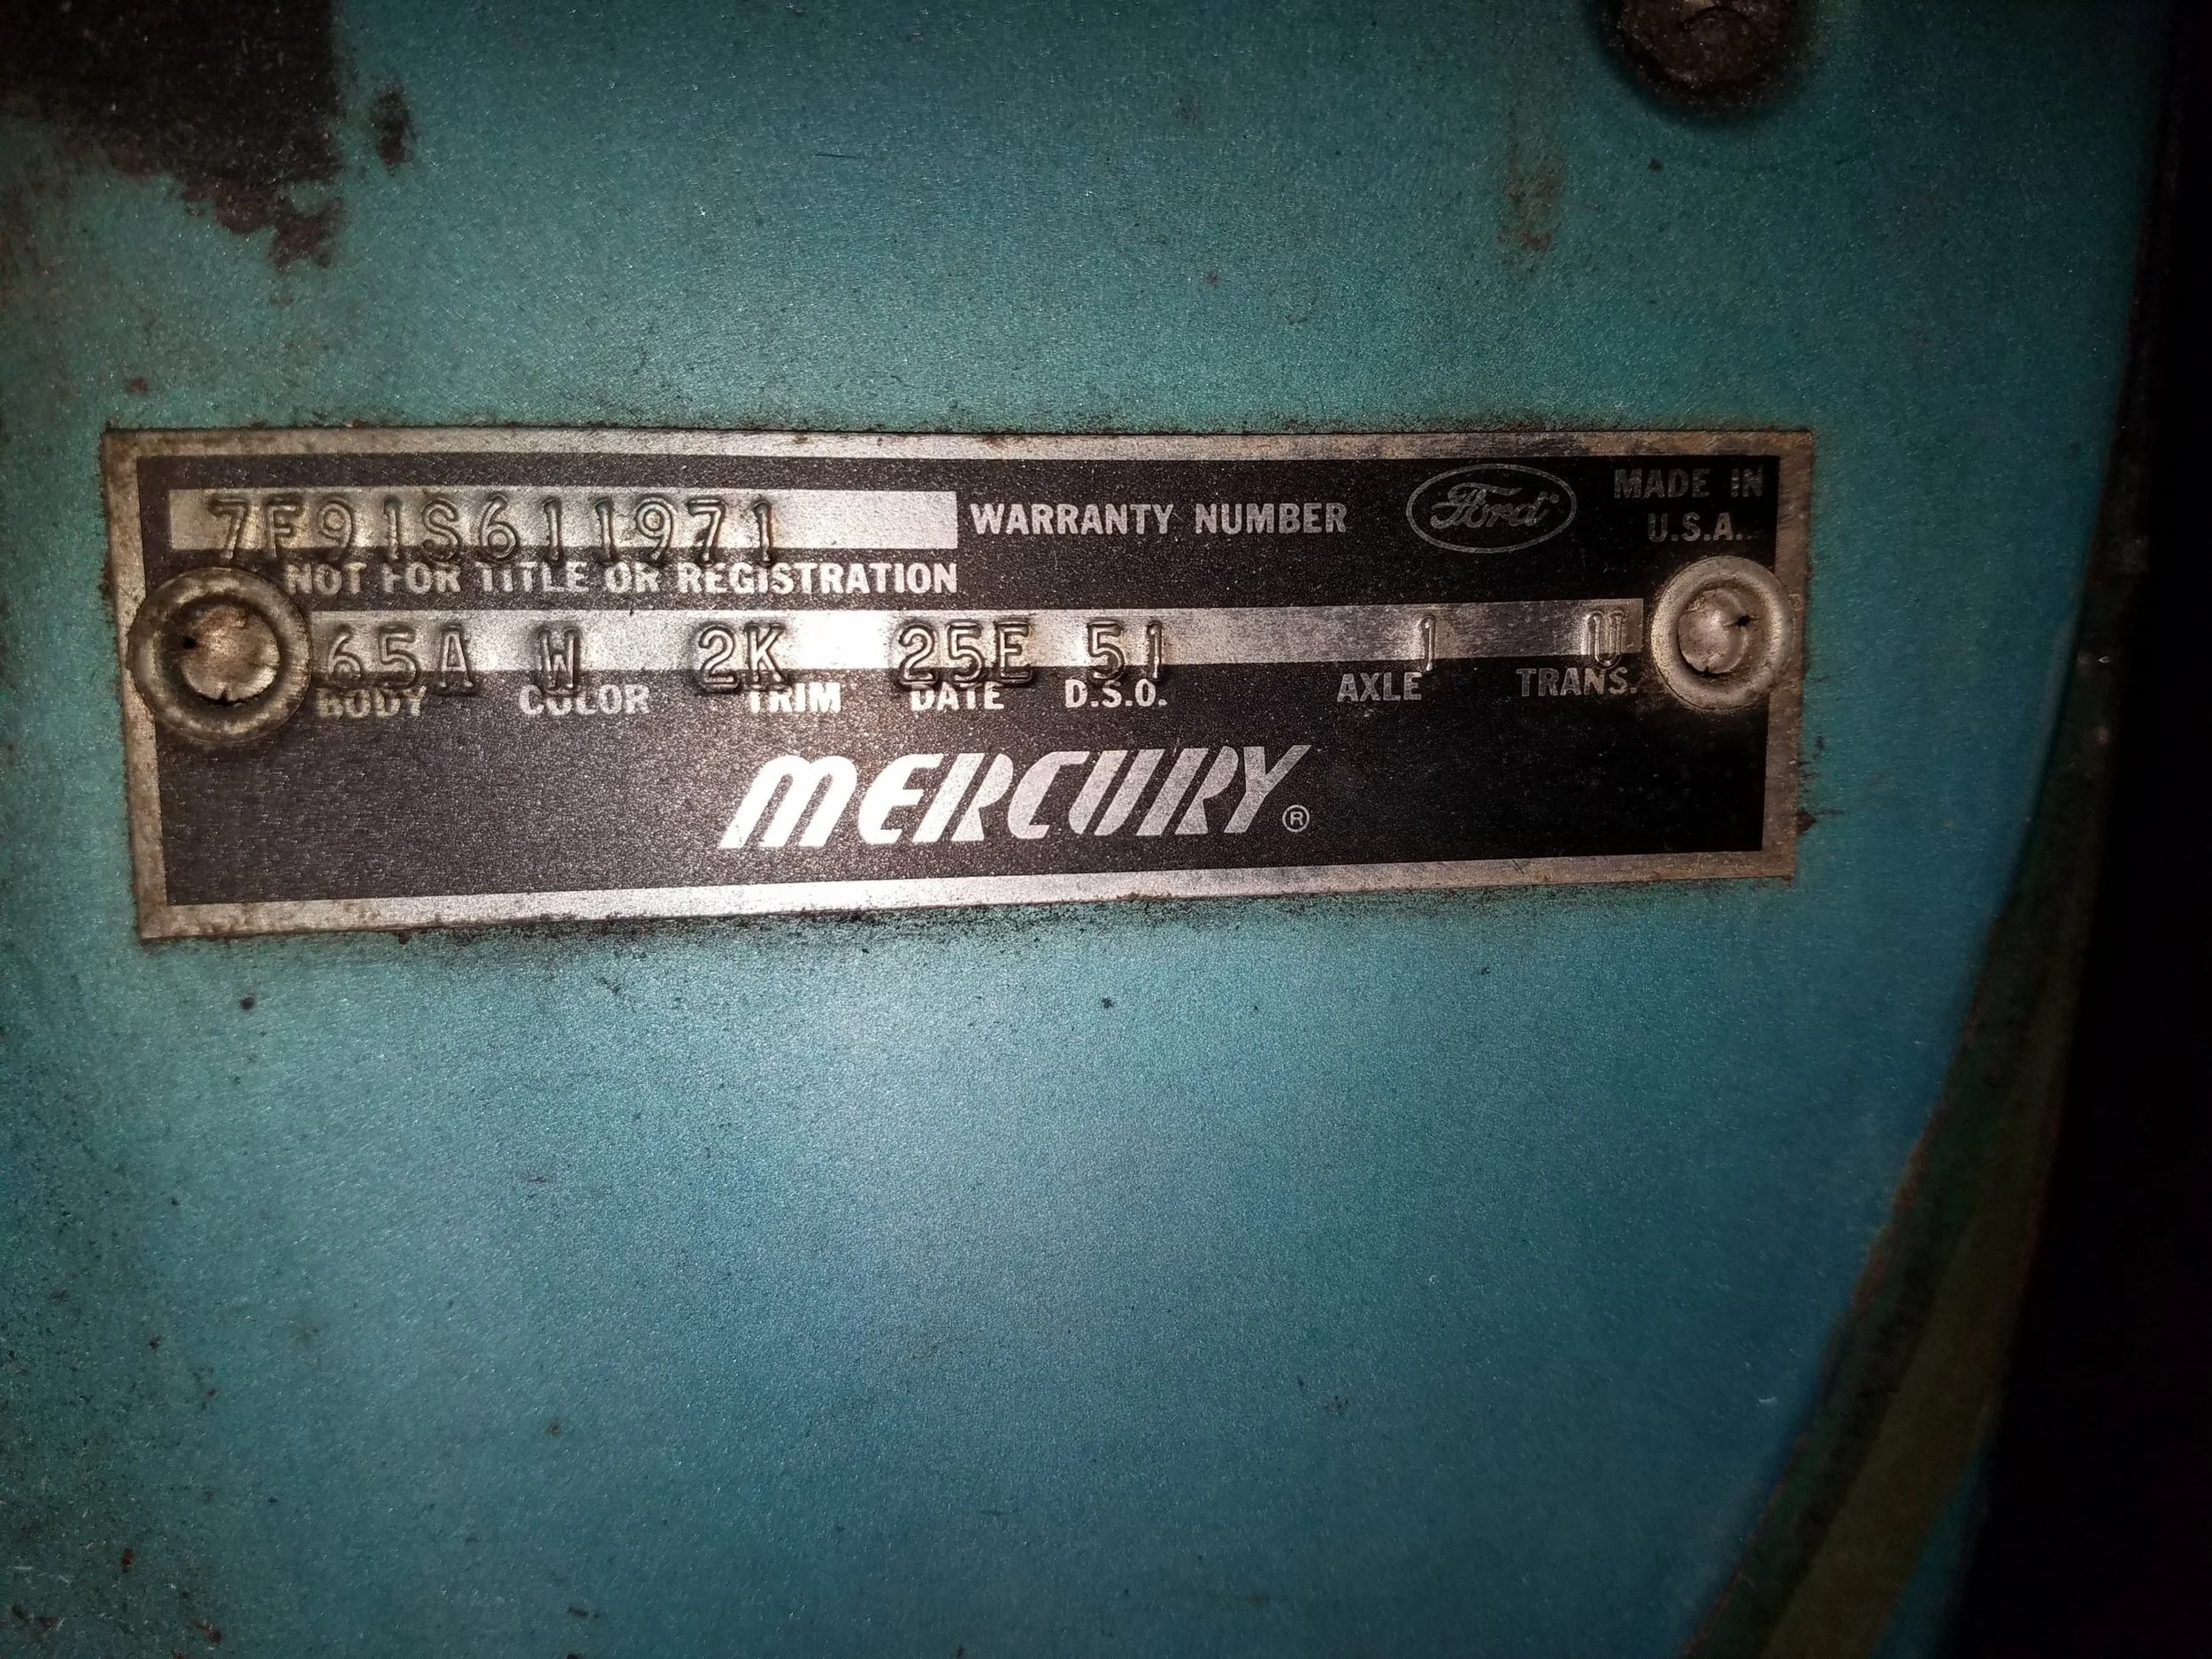
Check out the picture below showing the 3 different shades of blue this car has been painted. The badge on the inside of the door was a great find though, and indicates the color code, as well the other specs, of the car when purchased.